Decorative and Flat Concrete Finishing of Your Paths
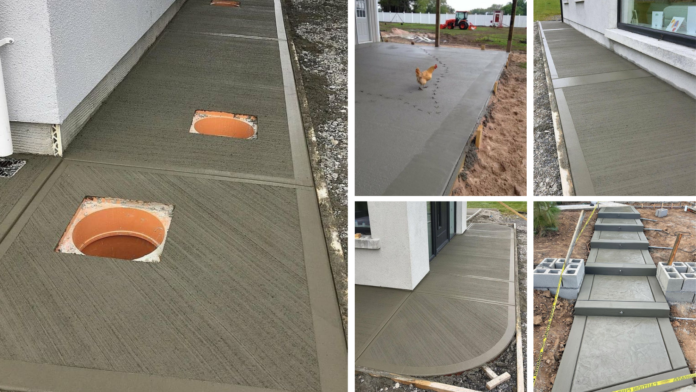
Good concrete starts with a sturdy base, and that applies to a concrete walkway as much as it does a concrete foundation. On level ground, pouring a new walkway is straightforward, but on sloping ground it may take a slightly different technique.
Once I’ve removed the topsoil and confirmed the remaining soil is free-draining and well compacted, I mark the location of the walk on the house and use these marks to place 18-in. stakes that support the 2×4 formboards. At the opposite end of the walk, I spread the forms to the correct width and attach a formboard for the end of the walk. Then I pull diagonal measurements to square the corners and use a level to slope the walk away from the house 1⁄4 in. per ft. Once everything is square, I drive in the rest of the form stakes and attach the formboards with 2-in. screws.
As I’m pouring the walk, I lift the reinforcing mesh and rebar into the middle of the concrete and screed the concrete flush with the top of the forms. Then I use a bull float to smooth the surface and force the aggregate down into the concrete. Bull-floating brings up bleed water that must evaporate before finishing can continue. When the bleed water is gone and a footprint leaves a 1⁄4-in. impression in the surface, it’s time to start finishing with a magnesium float. The mag float brings up a layer of water and cement particles known as cream. Once there’s a nice layer of cream, the edges can be rounded with an edge tool, and the control joints can be made with a groover.
After a pass or two with a steel finishing trowel, the walk can be finished with a stiff bristle broom pulled across its width. Rinse off the bristles with every pass for distinct ridges that provide maximum traction.
#1
#2
#3
#4
#5
#6
#7
#8
#9
#10
#11
#12
#13
#14
#15
#16


Я нашел в статье некоторые практические советы, которые можно применить в повседневной жизни.