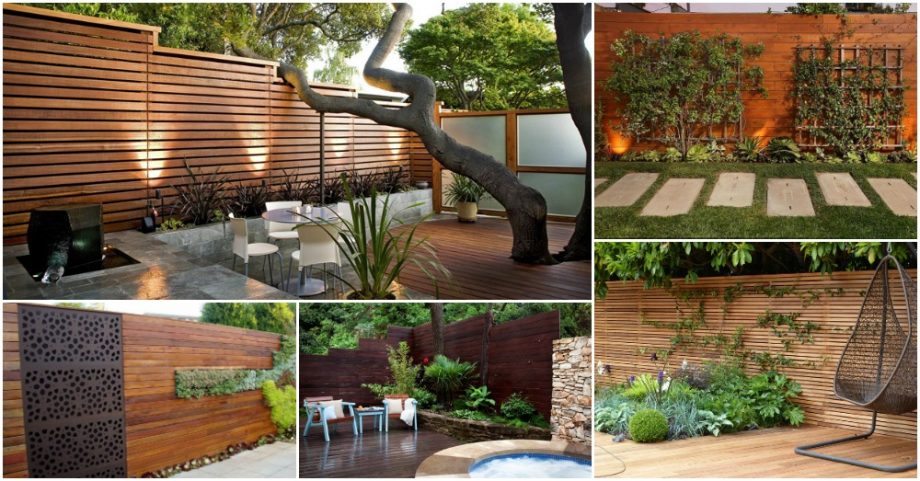
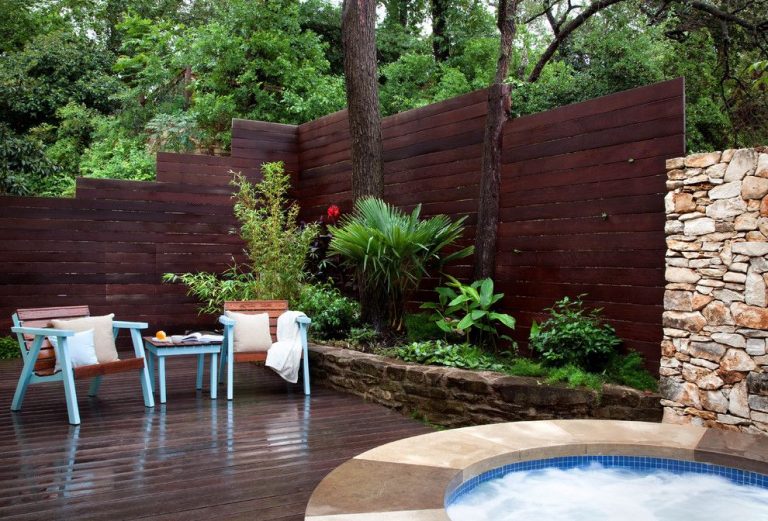
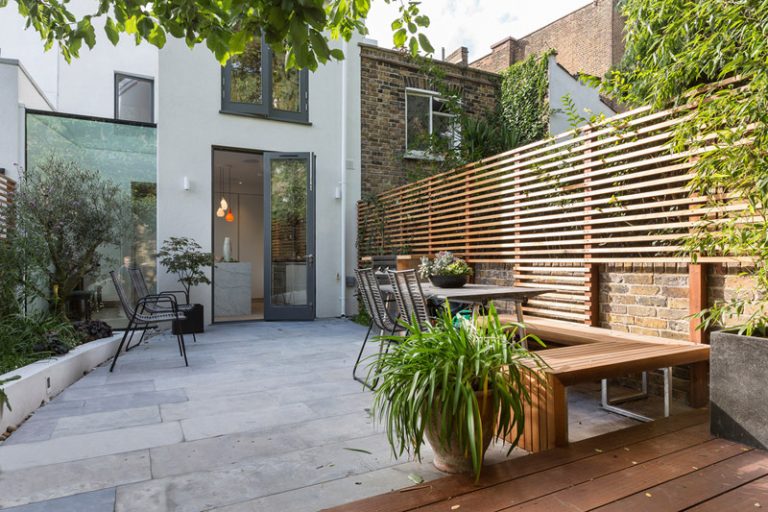
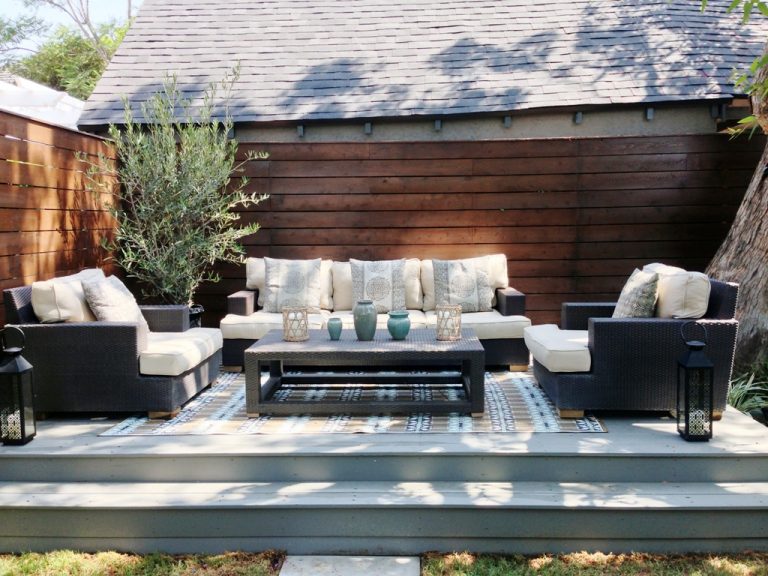
Your backyard can be your perfect spot for getting utmost relaxation and you should make sure to organize it in the right way. This should be your place for a peaceful retreat, so you should definitely protect yourself from the preying eyes of the neighbors. So, some fence panels can definitely add more privacy to your backyard.
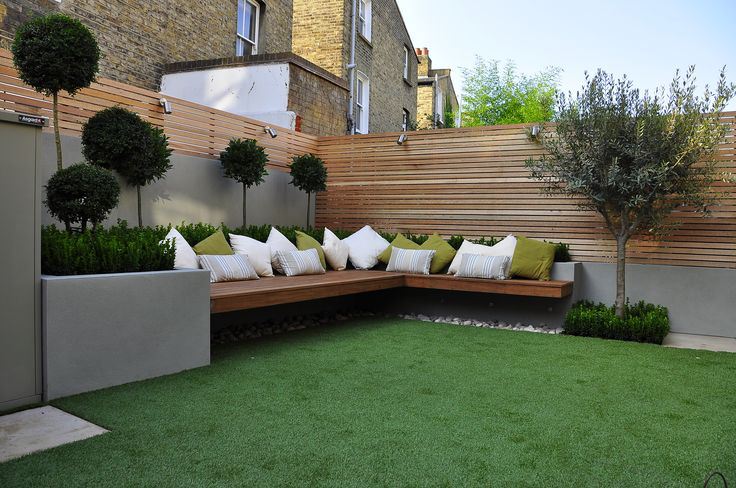
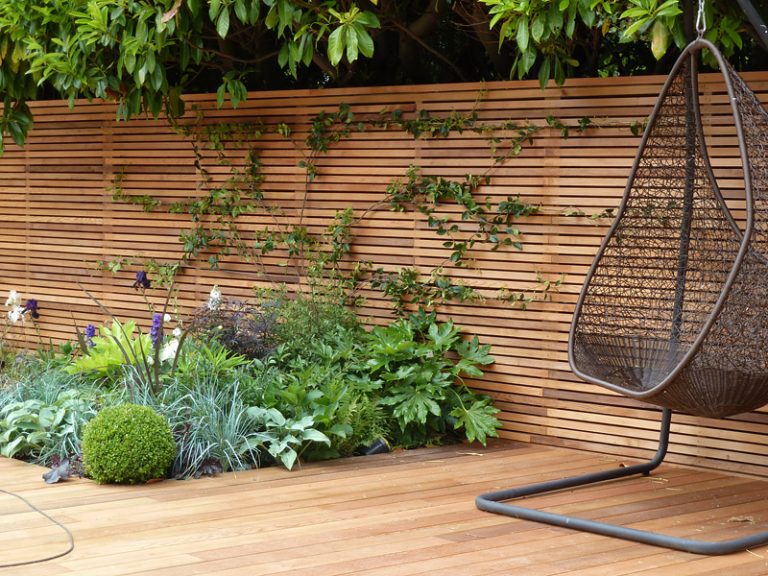
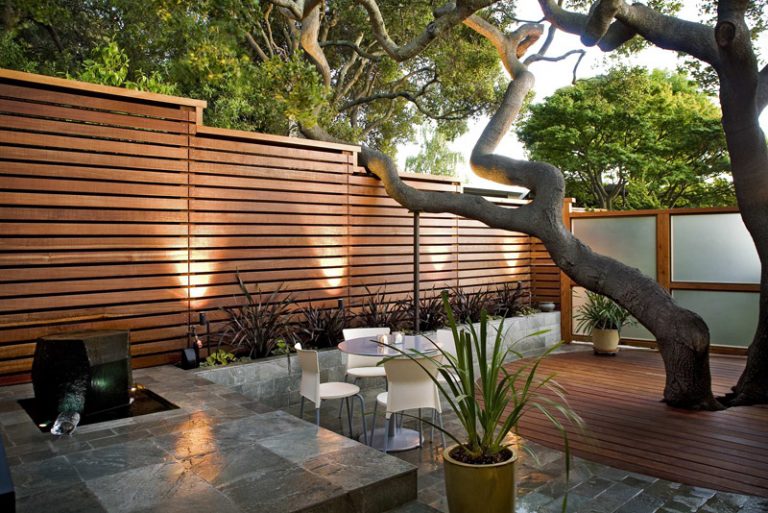
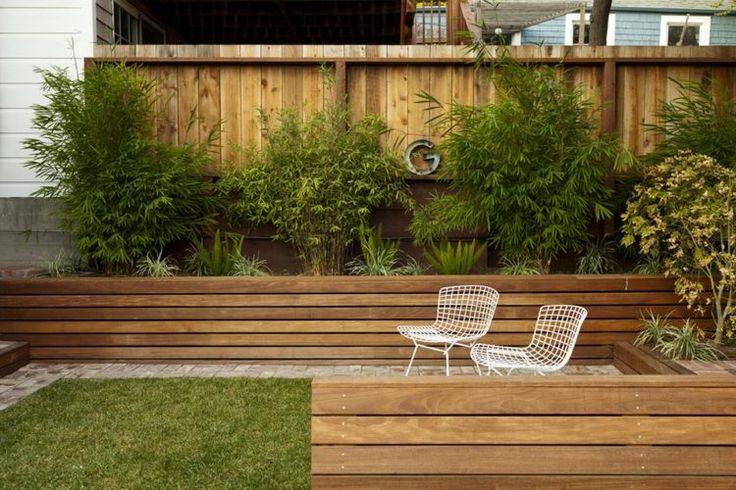
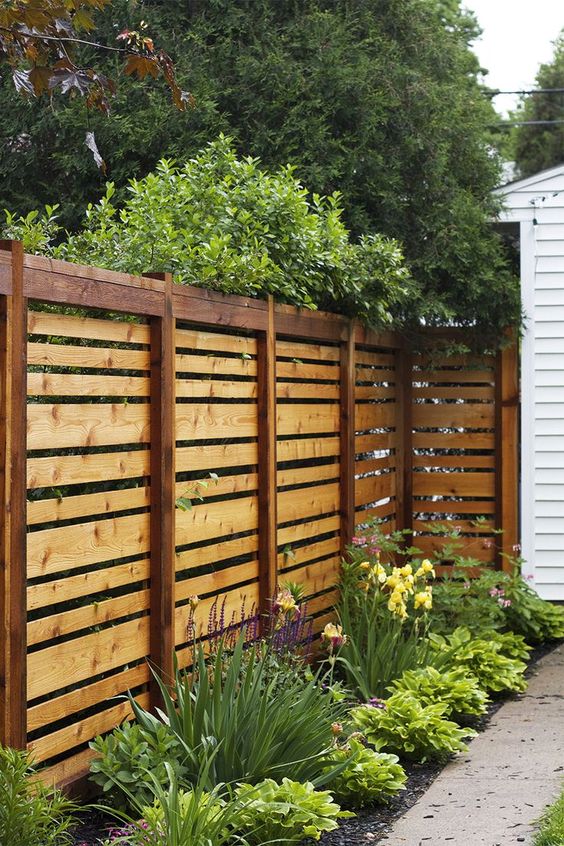
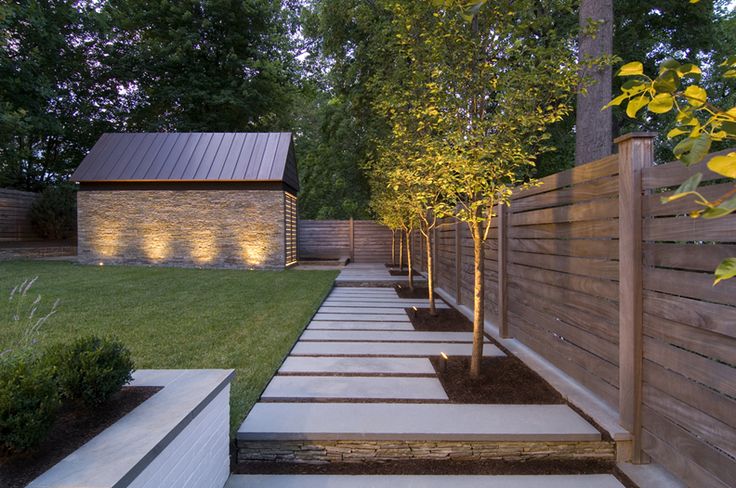
Fence panels can be found in versatile designs, so you will for sure find the right one to fit in with the rest of the yard decor. Most often they are based on horizontal lines with an average height. This height is the right one for giving the viewers access to the surrounding panorama.
Pros of fence panels
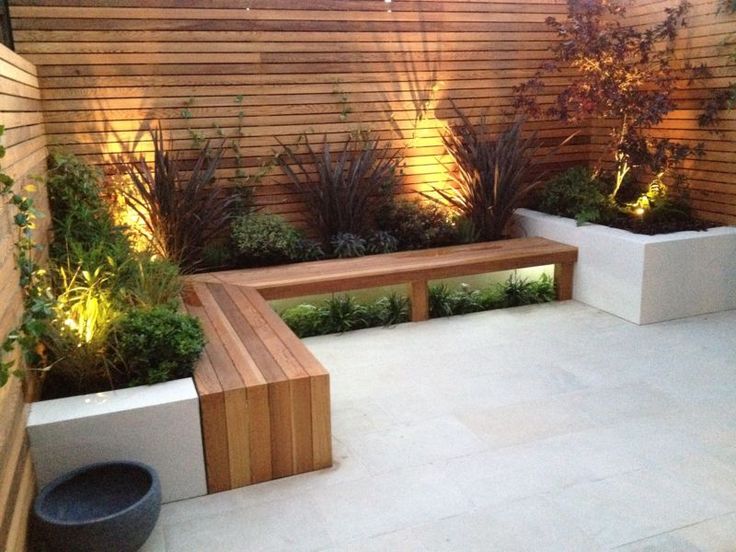
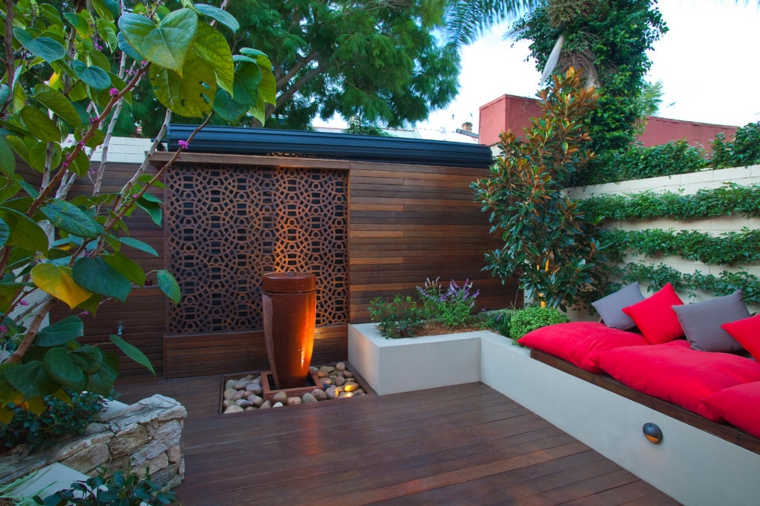
They are definitely many advantages of having fence panels in the backyard. First of all, they provide great protection against the wind making the yard warmer. They also assure animal safety and mark the private area. And of course, such panels can add to aesthetic appeal of the yard, no matter of their design. Some of them may even feature some light fixtures, creating a romantic mood over there.
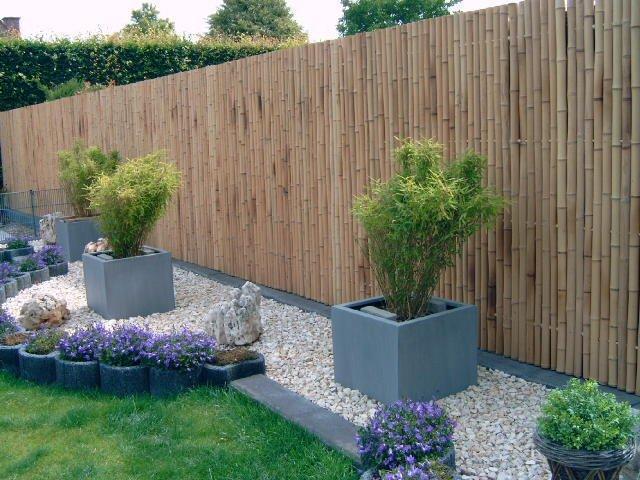
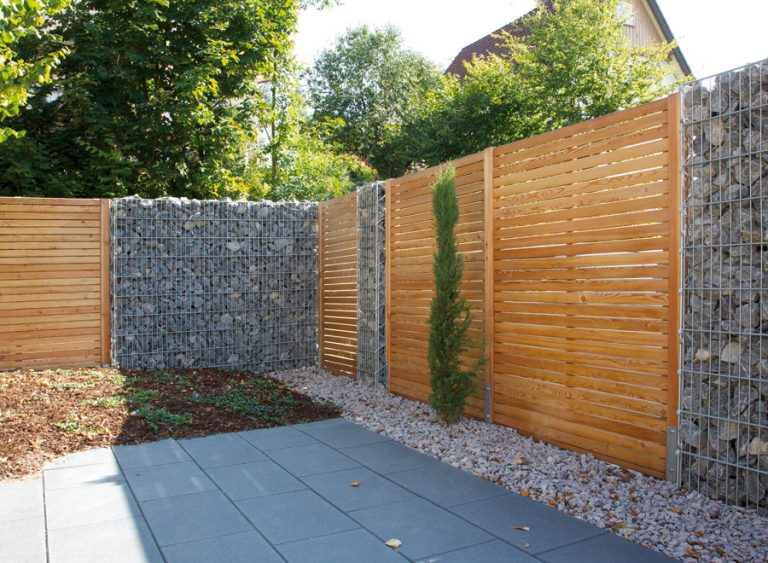
Fence panels can be quite versatile
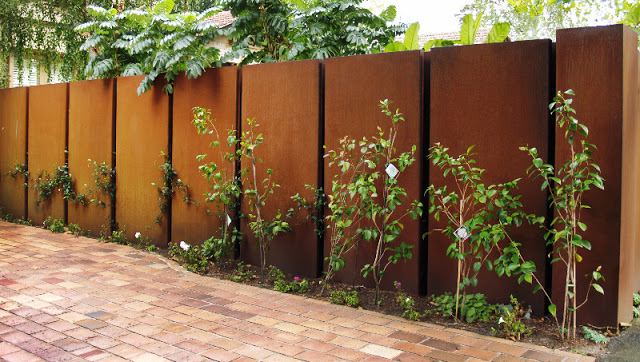
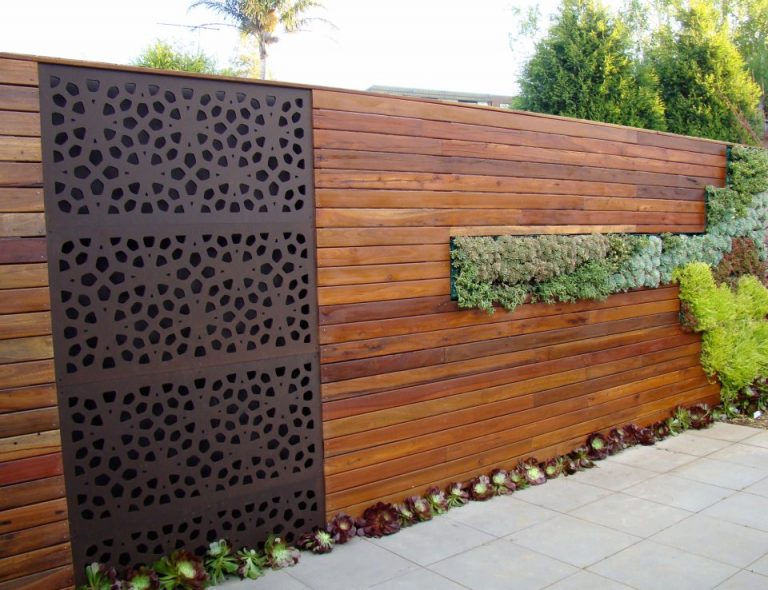
Fence panels may all have the same purpose, but they can be found in different designs. They can differ in the materials made of, such as wood, bamboo, metal etc. Also, there are some designs that can feature some decorations, such as built-in planters. Or some of them may be even a combo of two materials, like wood and gabion.


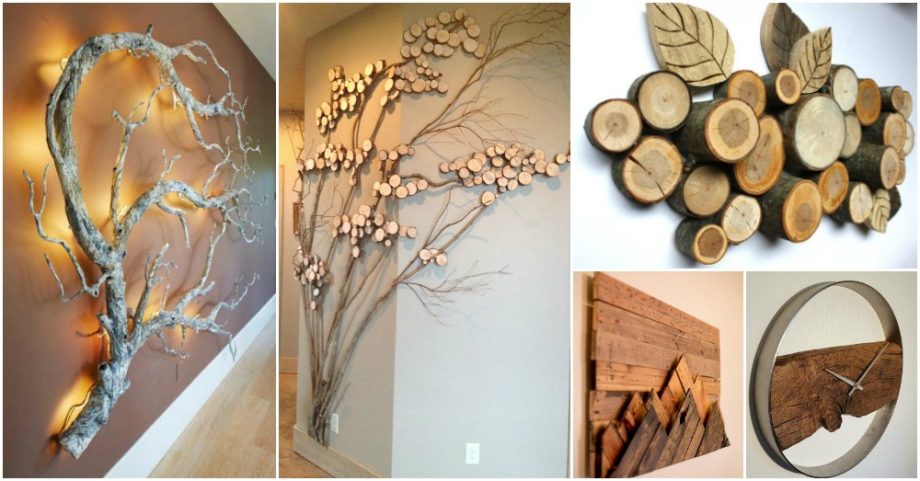
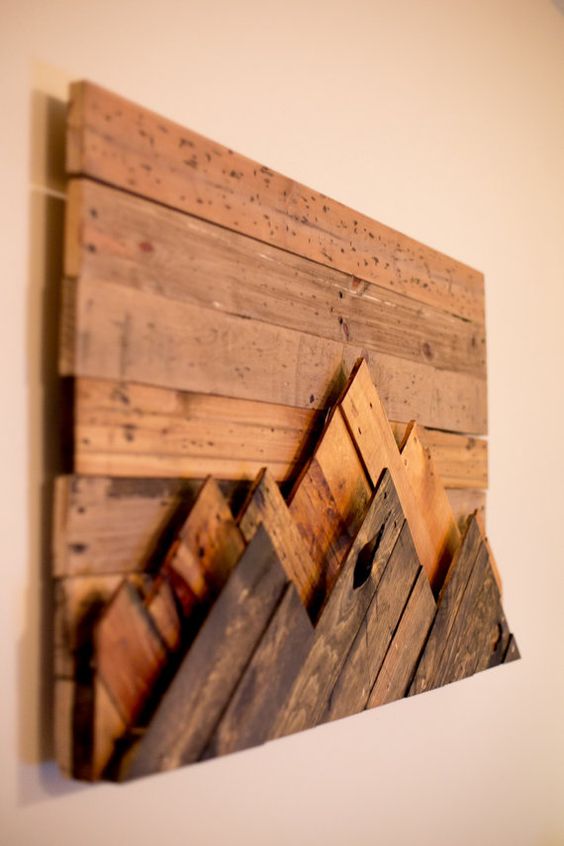
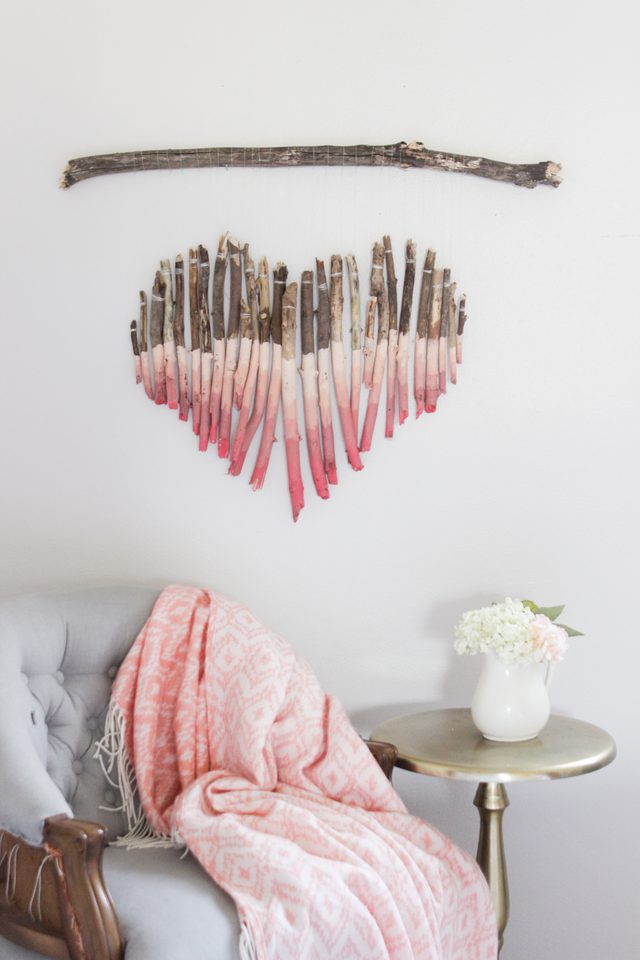
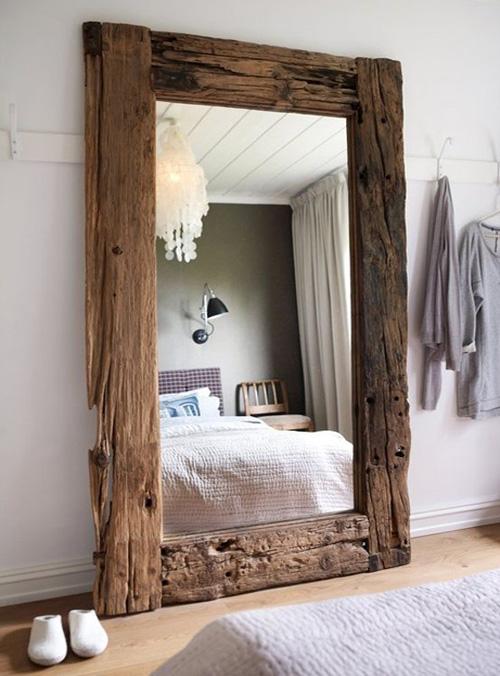
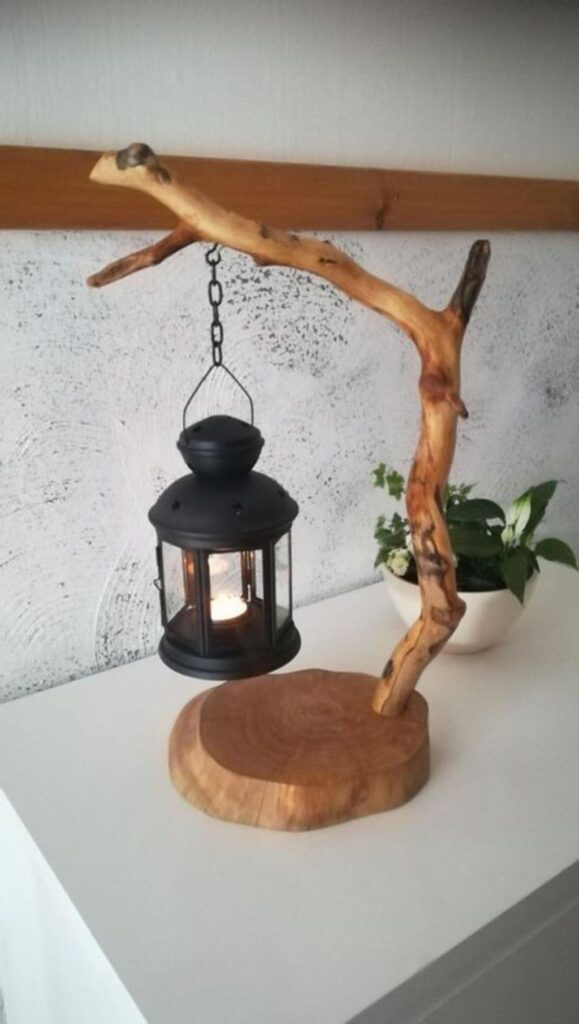
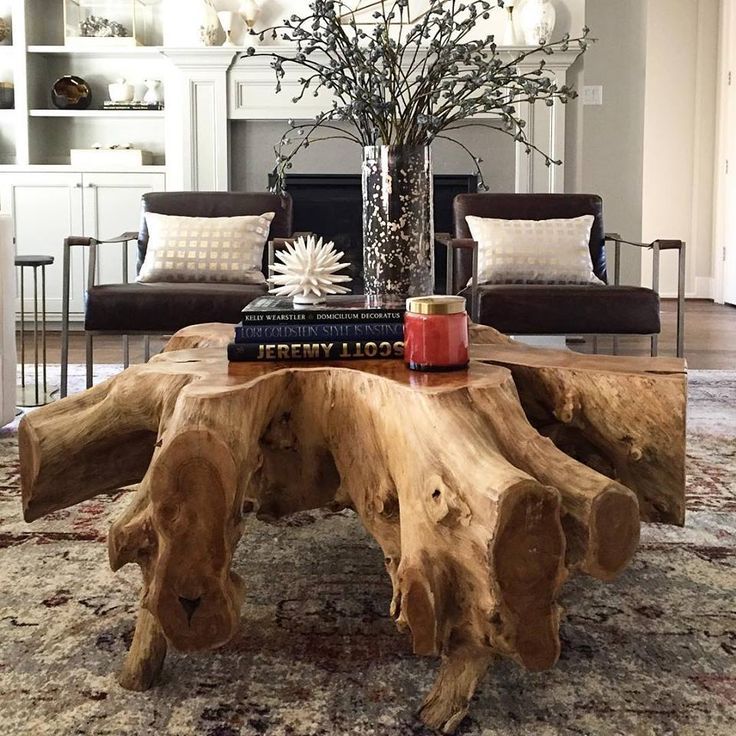
The best material for adding a warm touch into your home is of course wood. And besides buying wooden furniture, you can also buy or make some wood wall decorations. You can use different types of wood, such as pallets, driftwood, birches, tree stumps etc., and tun them into whatever you like.
Wood can fit into different home styles, so in case you don’t know what to hang on the walls, then you should choose some wood decorations. Whether you choose some tiny one or bigger that will make a statement, such decorations will definitely beautify the space. Here are several ideas to get inspired from.
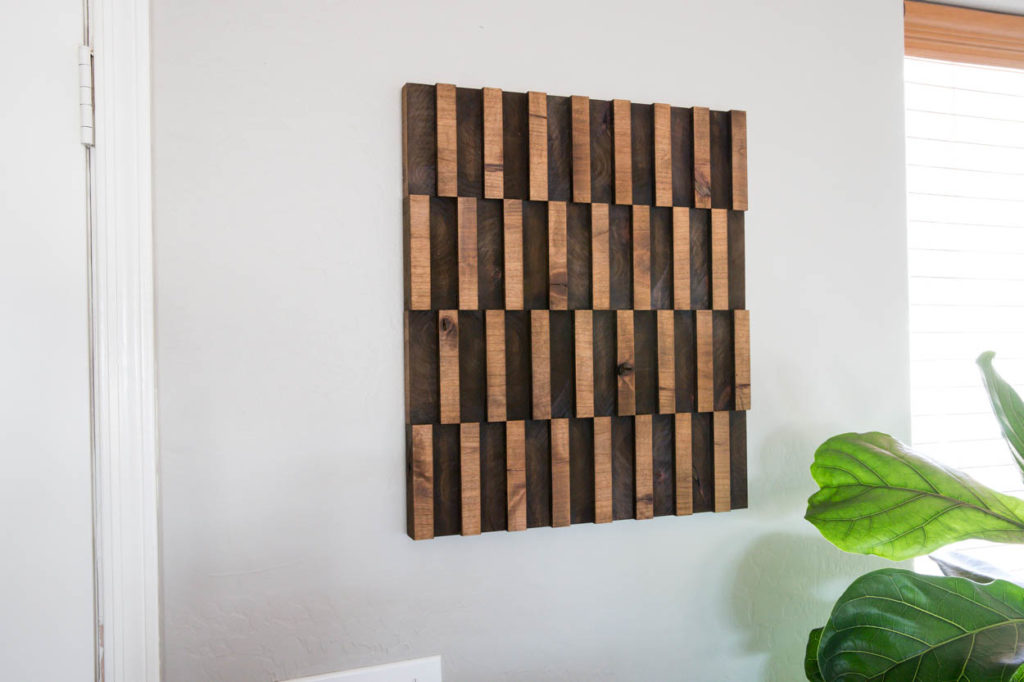
Wonderful Wood Wall Decorations
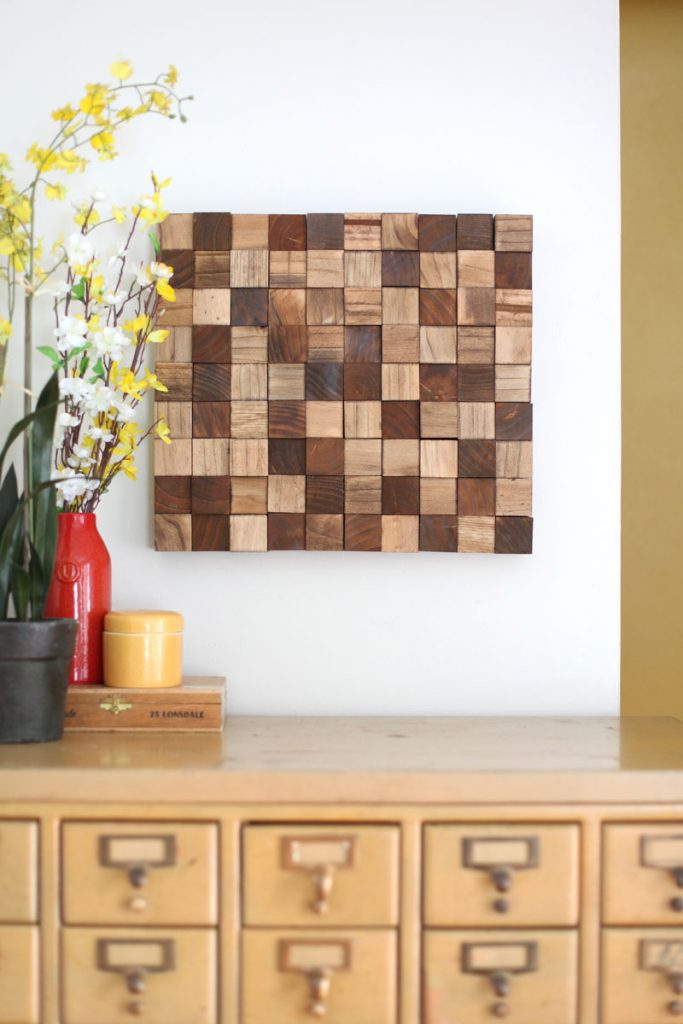
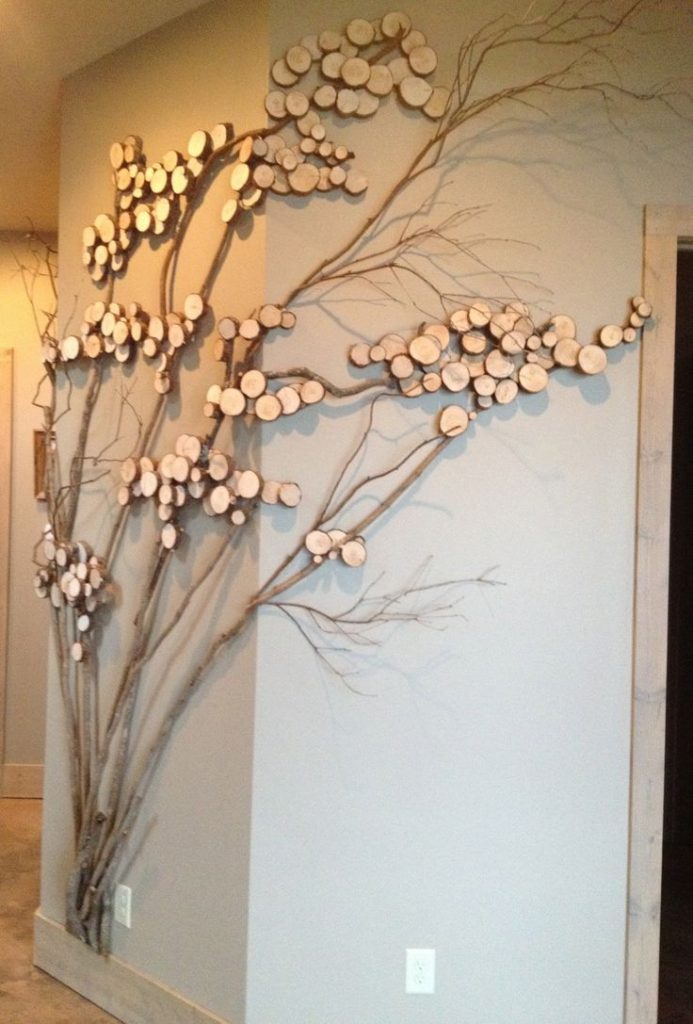
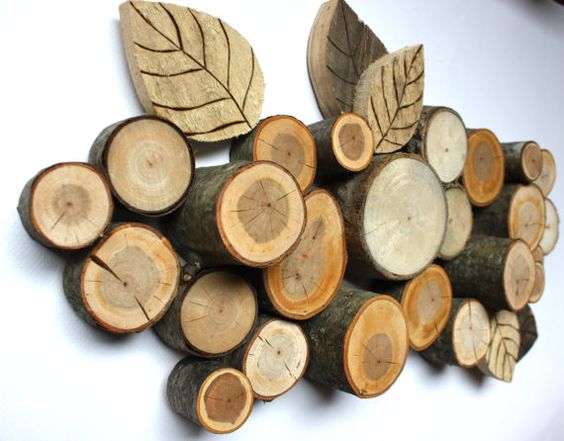
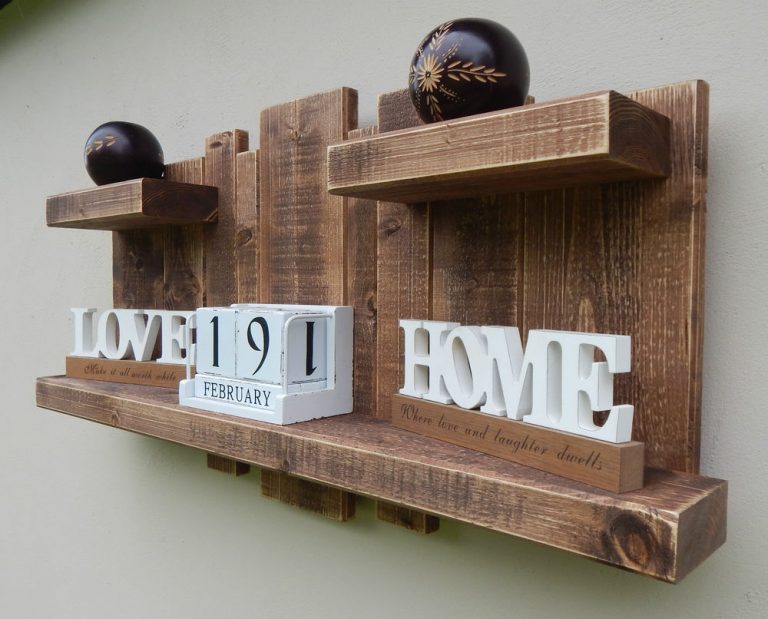
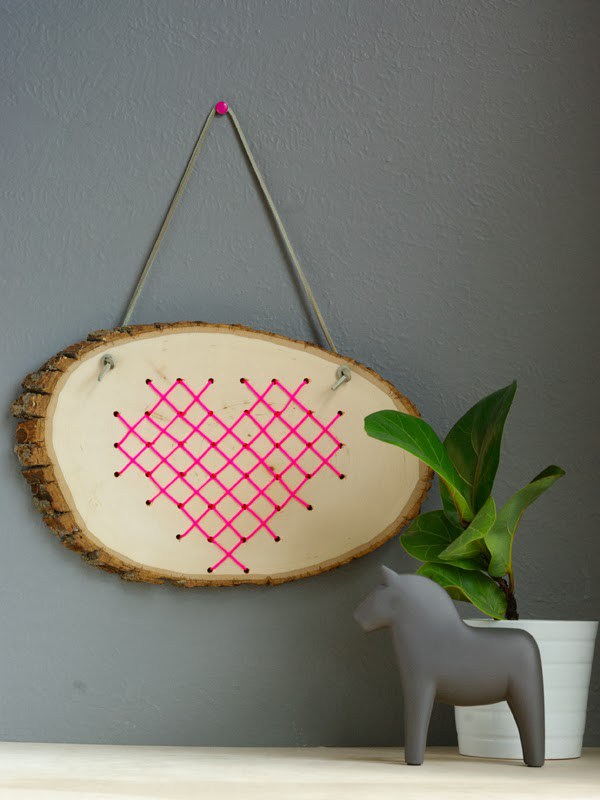
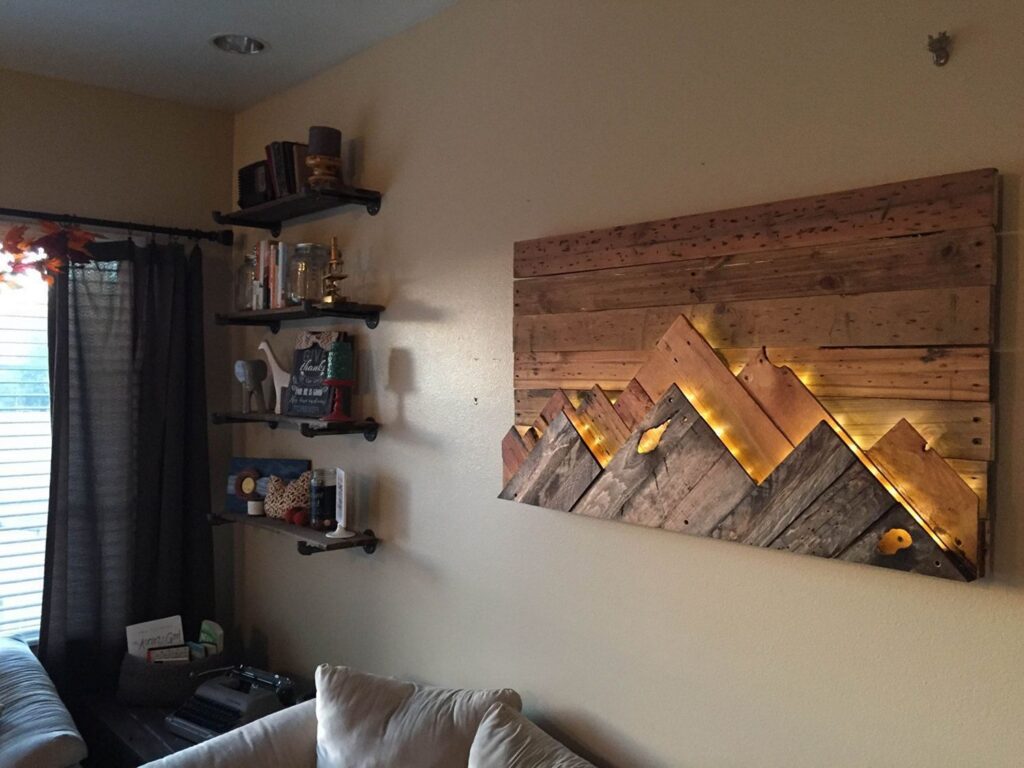
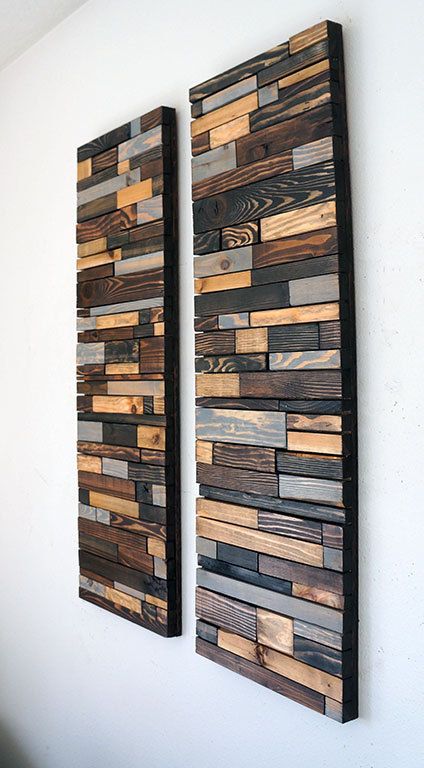
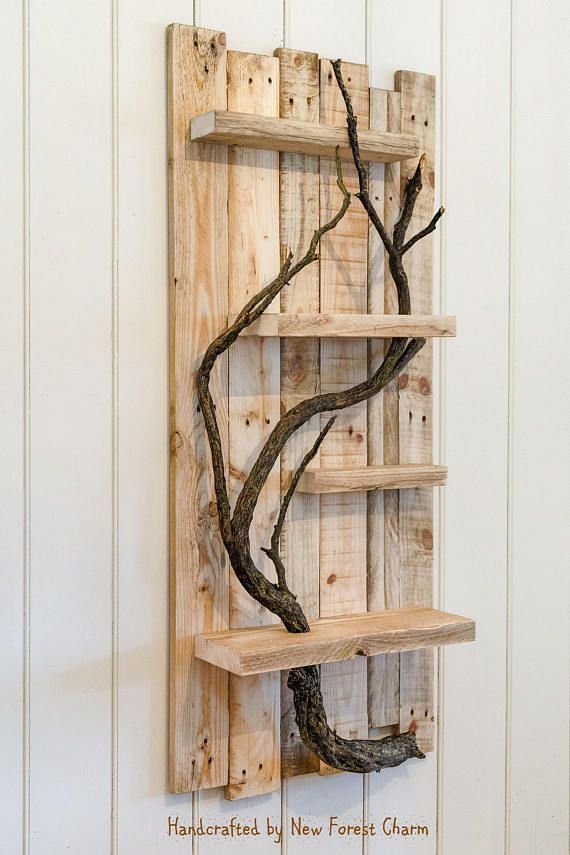
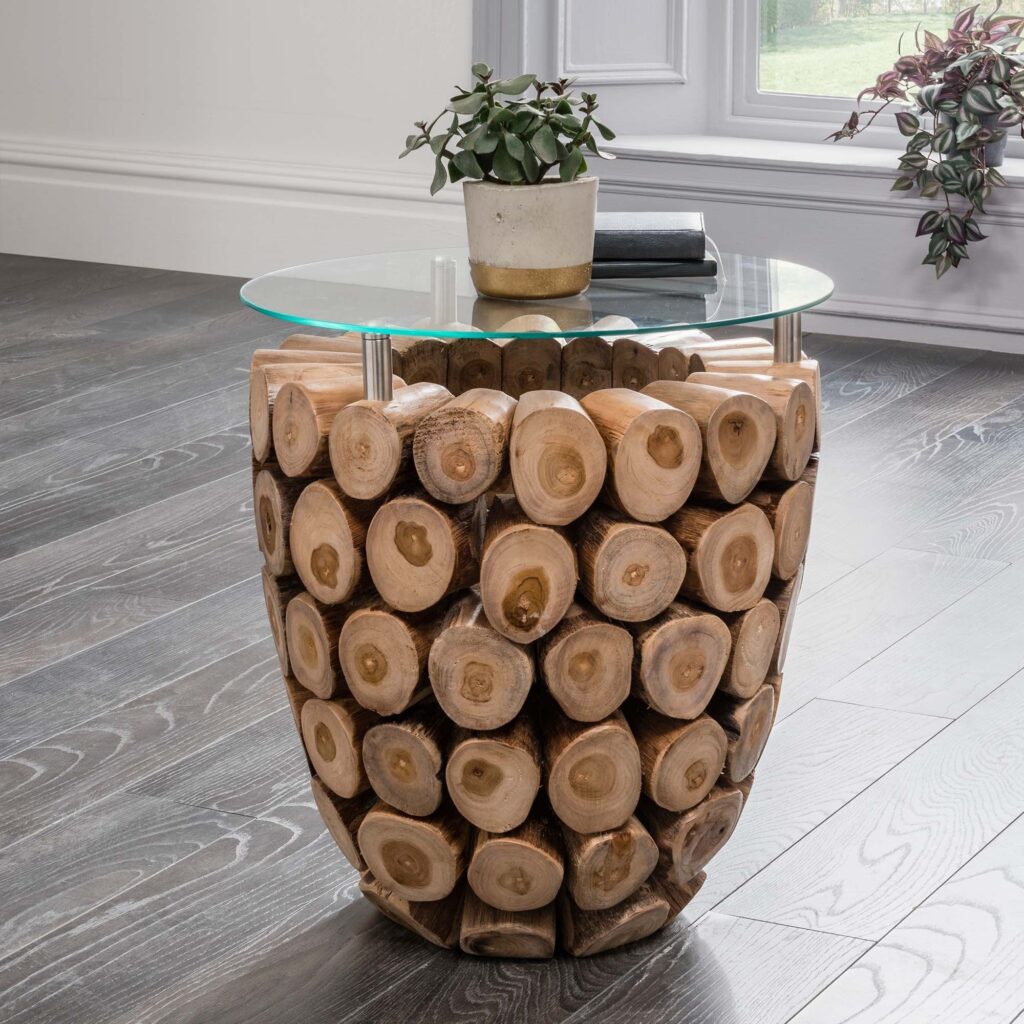
Wood is a natural material that can be easily cut and shaped which gives you the chance to make all types of wall artworks. For instance, you can make some shelves out of wood logs, or maybe create some interesting shape out of wood slices. Wood can be easily painted, so feel free to paint some wooden pieces and thus make some colorful decorations for the plain walls in your home.

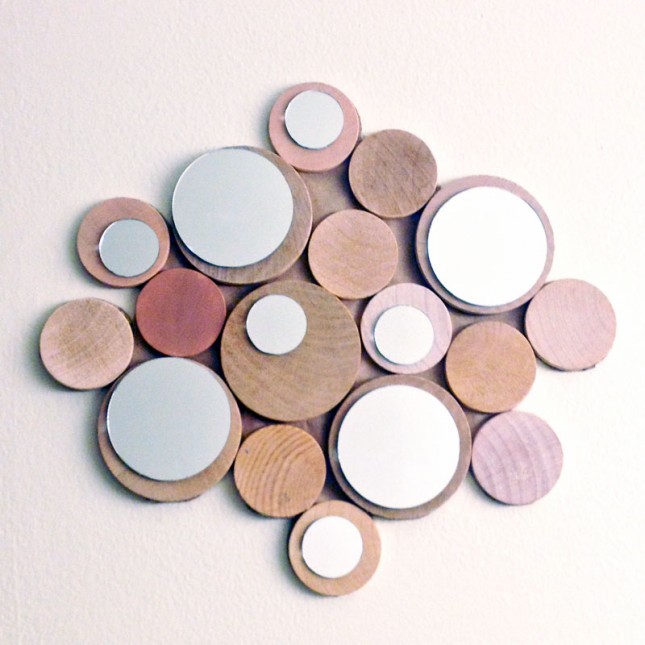

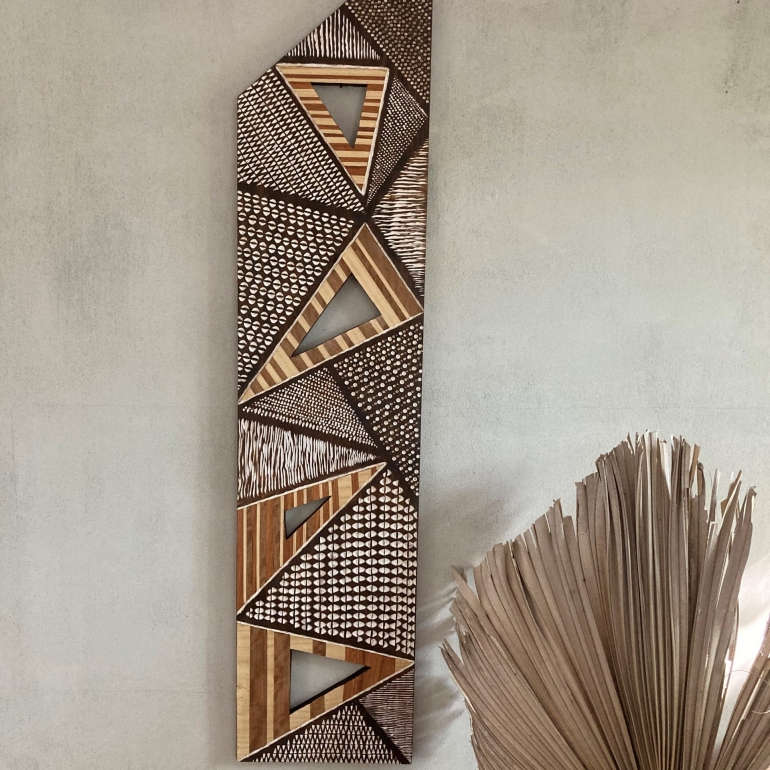
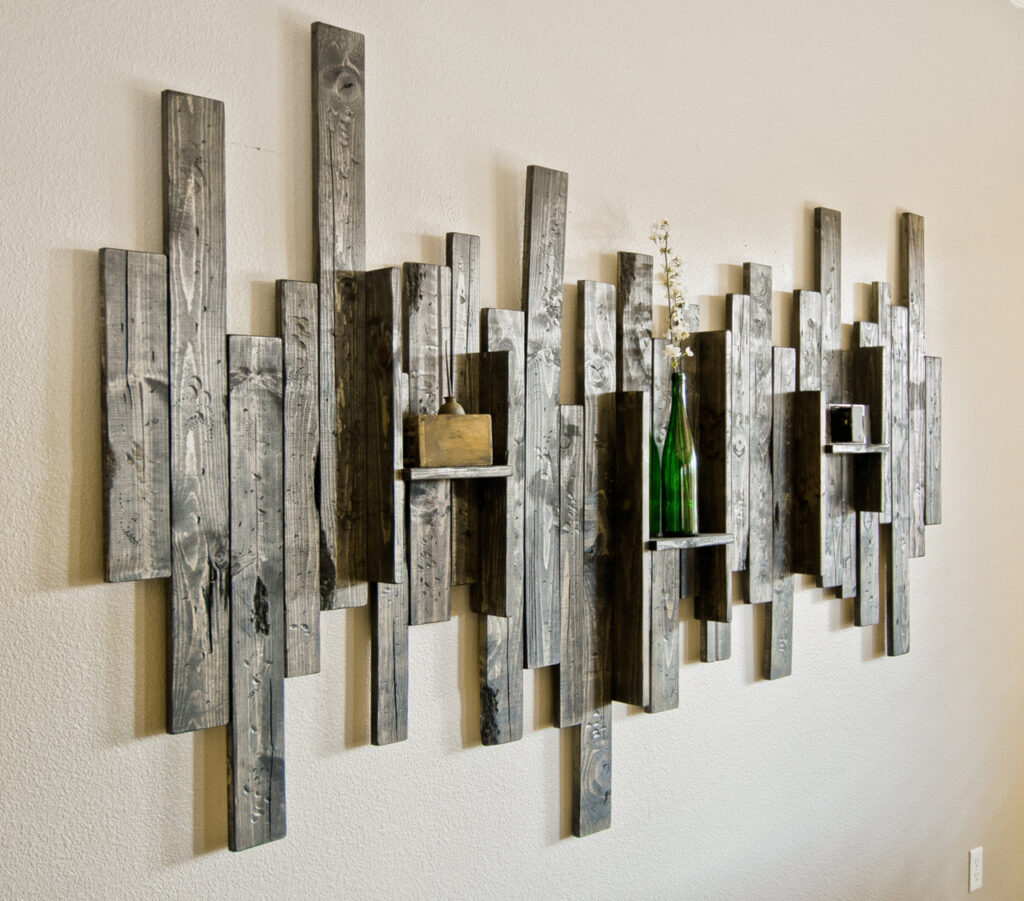
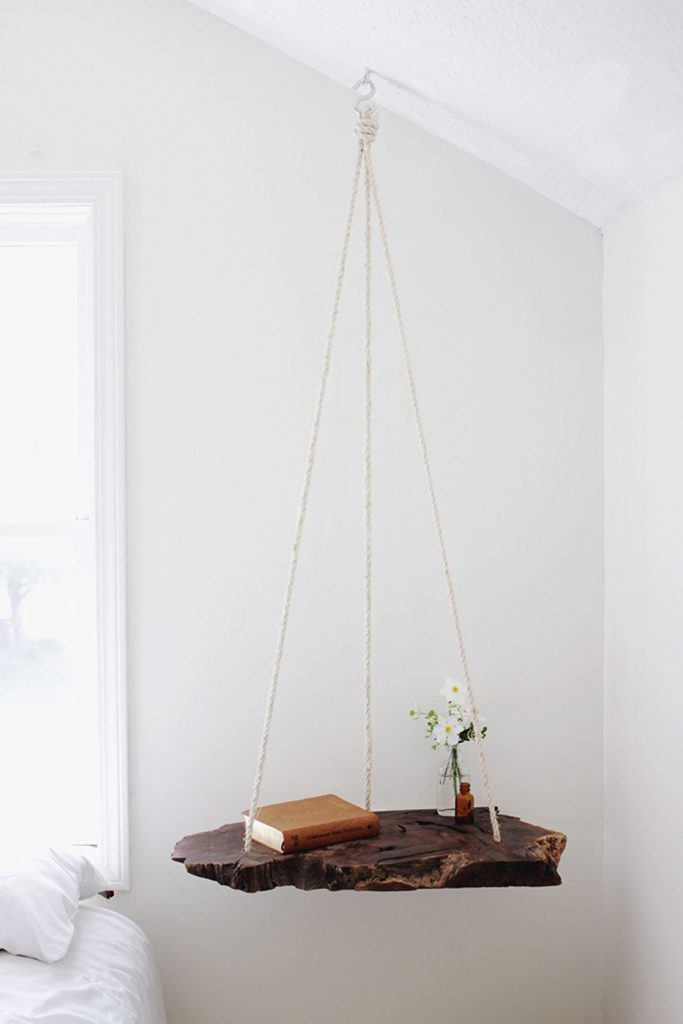
Be as creative as you can!
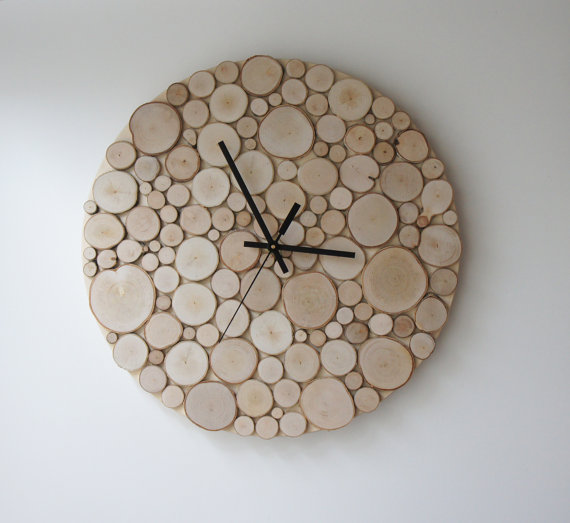
As you can notice these wood wall decorations are quite versatile and should get you inspired of how to make some such for your home. Be creative and make different shapes, paint them or maybe even add some lights to make the decoration even more eye-catching. You can even make some clock out of wood slices that looks far more better than the plain clock designs.


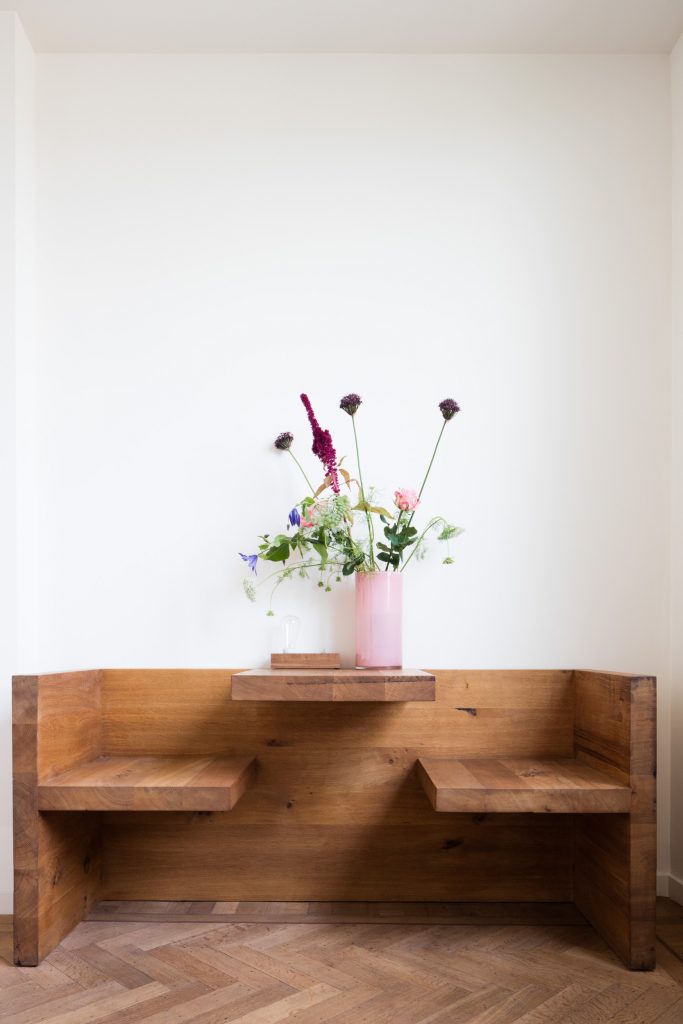
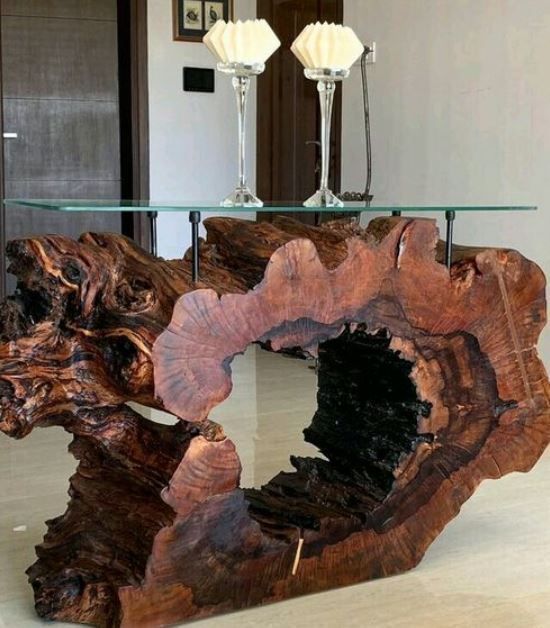
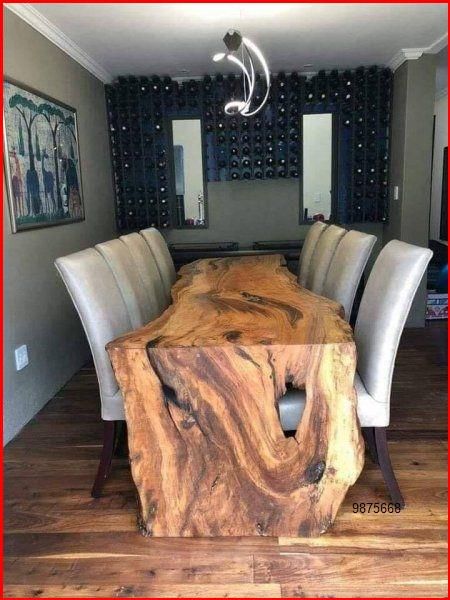
Wood has made a comeback and it is one of the most popular materials used in the interior designs. There are so many interesting ways to incorporate it in your space, but we wanted to ease your life and made you a collection of 10 wood decors for your home that will amaze you. Are you excited?
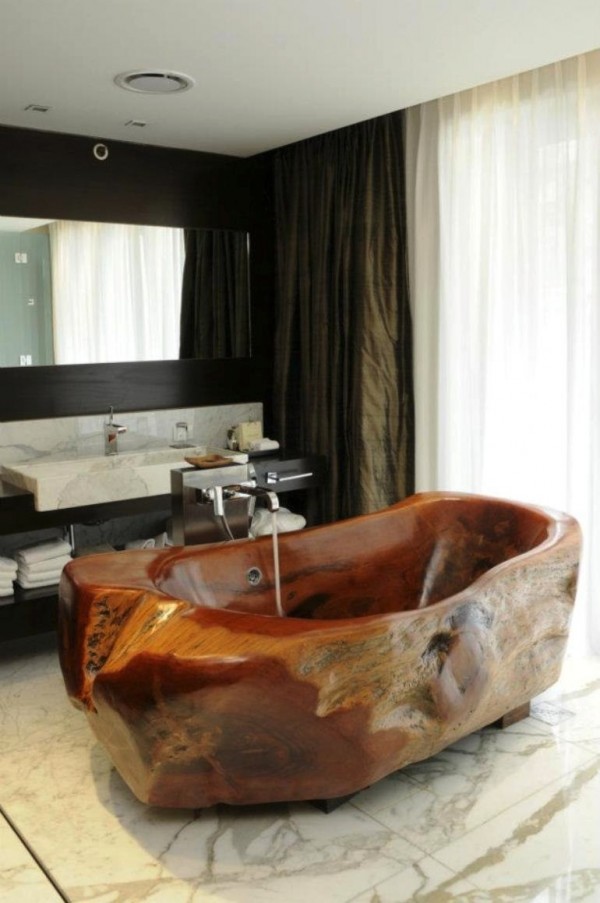
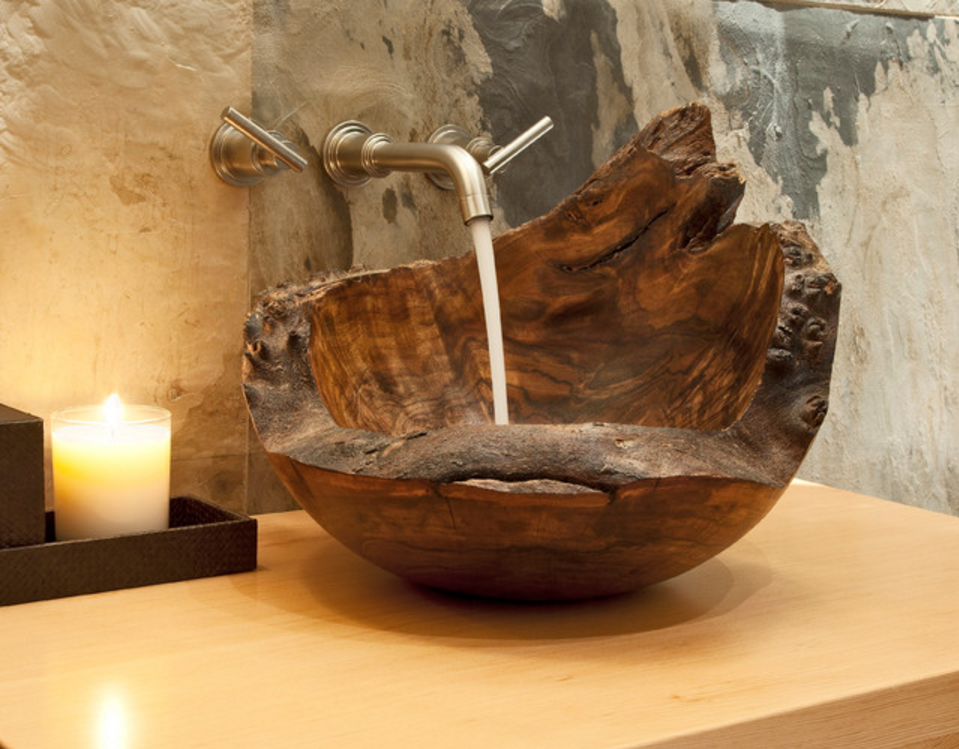
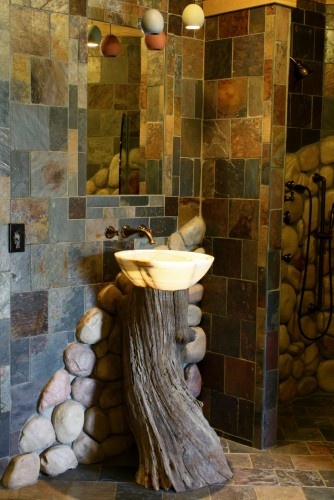
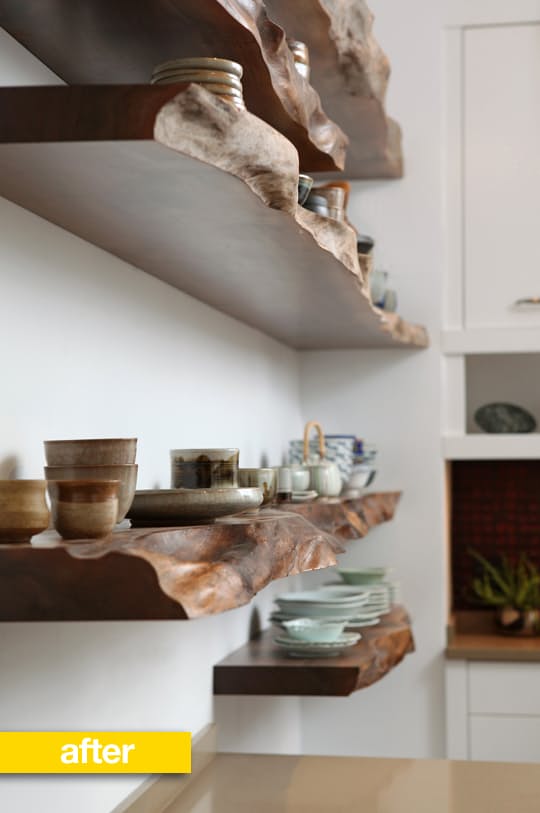
From bathtub to vanity and sink for your bathroom, to shelves, TV unit and wooden dining zone, below you can find almost any element you need for your home made from wood. So, let’s take a look at the gallery and draw some inspiration. Enjoy!
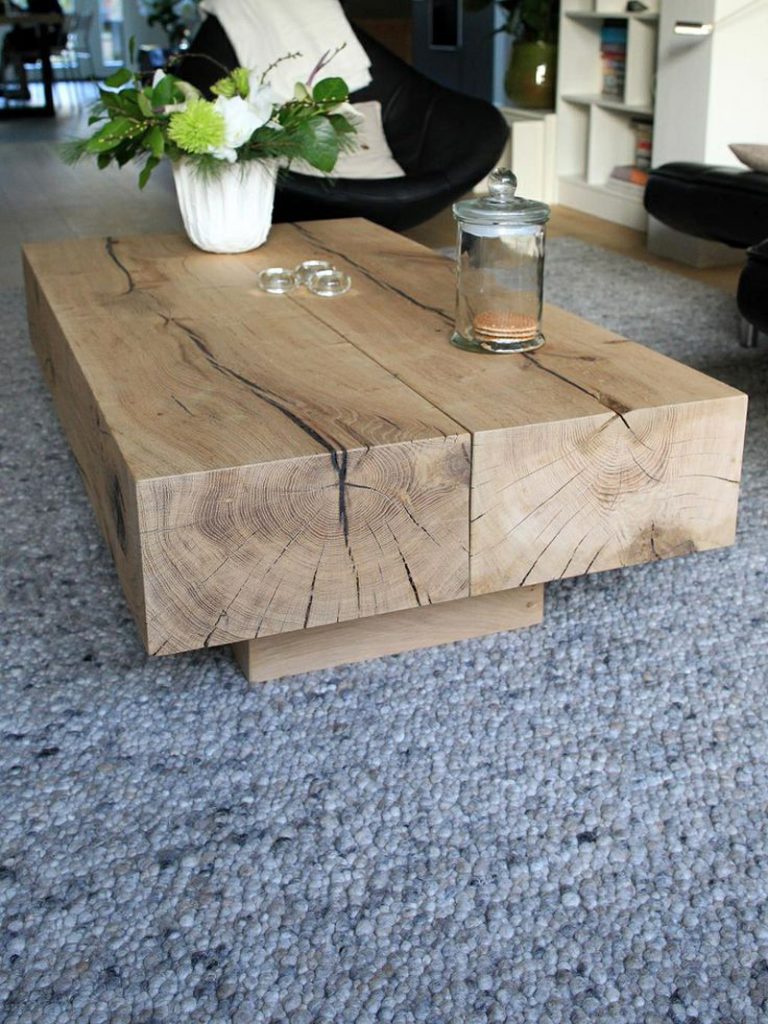

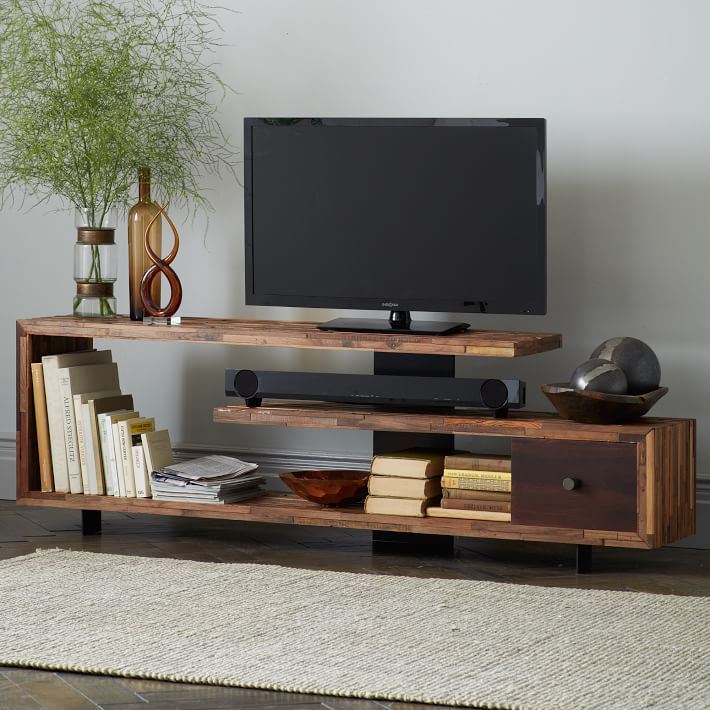
Unlike the aluminum, concrete and steel, huge amounts of fossil fuels are not required to turn wood into a suitable material. Wood is extremely strong, eco friendly and very durable. And if you are looking to add a touch of timber to your space, you should definitely choose one of these wood decors. I need to mention that they will make your space warmer, more inviting and comfortable.

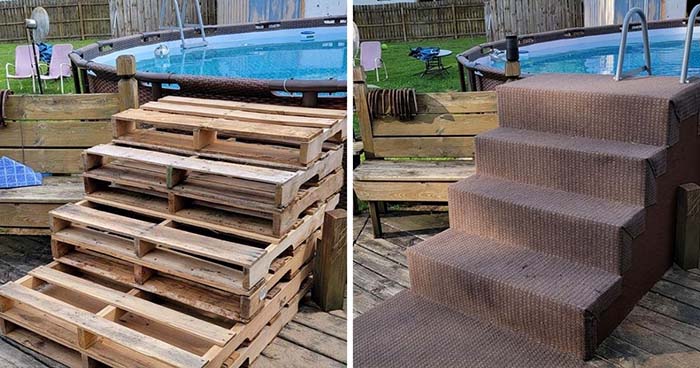
That’s where this DIY project comes in handy, you can learn how to make above ground pool steps that are wider and easier to climb. The best part?
You don’t need to be an expert woodworker.
Materials and Tools
- 6 wooden pallets
- 3 sheets of marine-grade plywood
- 4′ x 10′ outdoor carpet remnant
- Measuring tape
- Paint
- Waterproof sealant
- Hand saw and/or jigsaw
- Drill and wood screws
- Sandpaper
- Paintbrush or roller
- Staple gun and staples – Our recommendation YEAHOME Staple Gun
- Heavy-duty scissors
How to Make Above Ground Pool Steps: Instructions
These handy steps use inexpensive materials that you can source cheaply at any lumber yard. Plan to spend a full day on this project, as you’ll need time for the paint to dry.
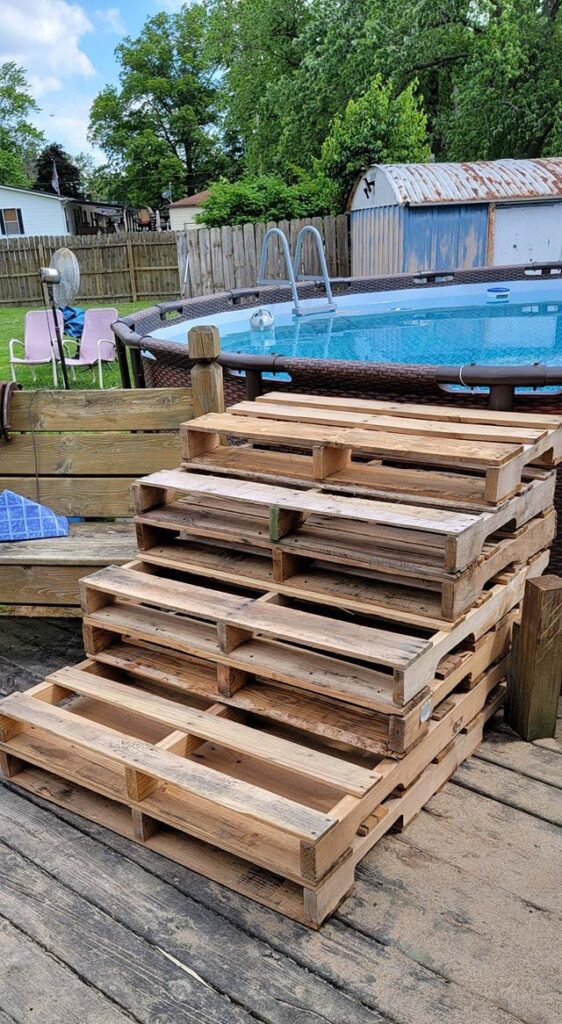
Stack two pallets next to the pool, with the narrower sides sitting flush with the pool wall. To form the next step, cut approximately 1 foot of length off of two more pallets. Stack them on top of the bottom layer. Cut a fourth pallet in half; stack the two halves on top of the second layer. Then, take your final remaining pallet and cut two 1-foot sections. Depending on the height of your pool, you can use one or both of the sections to form the top step.
Once your pallet “stairs” are the right height, you can adjust the length of each step by trimming each pallet layer with a hand saw. When you’re happy with the stairs, secure the pallets together using a drill and screws. Shake the stairs with both hands to make sure the pallets don’t slip.
Stand a sheet of plywood flat against the side of your pallet stairs. Ask a friend to hold it in place, or secure it with a stack of cinder blocks. Sit on the stairs and use a marker to trace the shape of the stairs directly onto the board. Repeat this process on the other side with another sheet of plywood. Using a jigsaw or a hand saw, cut out the shapes.
Using a drill and wood screws, secure the cut pieces of plywood to the sides of your stairs. They conceal the pallets and reinforce the structure. If you prefer, you can also use a hammer and nails for this part of the process.
Use a measuring tape to measure the length and depth of each stair tread. Draw them on your plywood and cut them out using a jigsaw. Lay them on top of the pallet stairs and secure them with your drill and screws. Repeat this process for the front panel of each stair.
Sand the raw plywood edges using sandpaper. You don’t need to make them perfectly smooth — just remove any large splinters or sharp pieces of wood.
Paint the tops and sides of the stairs using a paintbrush or roller. Any type of paint will do. If your stairs are sitting on a deck or patio, lay newspapers or a drop cloth underneath the edges to protect the flooring. Allow the paint to dry completely.
Coat the stairs using a waterproof sealant. Use a paintbrush to apply the sealant all over the plywood, paying special attention to the seams. Leave the sealant to dry according to the instructions on the package.
Lay the carpet remnant over the stairs, leaving a few inches loose behind the top step. Fold that excess over the back edge, straighten the carpet, and use your staple gun to secure the carpet to the back of the steps.
Fold the carpet over the front of the top step, and add a few staples along the front panel. For safety, avoid putting staples on the tread itself.
Continue folding the carpet over each stair, fastening it with staples as you go. When you get to the bottom, you have two choices. If your carpet remnant is short, fold the end under the bottom step, and staple it in place. If it’s longer, you can extend it across the grass or the pool deck as a walkway.
Use heavy duty scissors to trim the sides of the carpet. Leave about 4 or 5 inches. On the vertical face of the top step, fold the carpet edge back toward the pool. Smooth it out and staple it down. Then, fold down the remaining carpet on the top edge of the stair, creating a neat seam.
Adjust and trim as needed. When you’re happy with how it looks, staple the carpet to the plywood. Repeat this process on the side of each stair. To make the carpet easier to manipulate, cut out a square notch between each stair
Source: www.decorhomeideas.com
]]>